Jul 4, 2016 | Daily, How to
Thoughtful friends or neighbors offer you lovely cherries fresh from their tree. Who doesn’t love cherry pie? Warm cherry crisp? Fresh cherries have to be better than the bright red viscous ooze you buy in a can, right?
Unless you have or intend to immediately buy a cherry pitter, tell your considerate neighbors no, thanks, but I have more pressing matters to attend to, such as unspooling and measuring the toilet paper to be sure I got all 318.7 square feet Costco promised me. Then buy some cherries already pitted.
Next best method, buy a damn cherry pitter.* It’s the only way. Chopstick? Liars. Smash under a knife and remove the pit from the glop stuck to your cutting board? Might as well chew it up and spit what’s left of the cherry into one bowl and the pit in another. Use a straw to push the pit out? Maybe, if your straw is made of titanium. Use a nut/lobster/crab/dental pick? Only if you have unlimited time to produce cherry mush. Cut around the pit, then twist the two halves away from the pit? Sure, if the pie you’re making requires no more than five cherries and you don’t mind wearing more cherry than you eat. All of these ideas? Lies, lies, and more lies.
*This is the only cherry pitter I’ve ever used, so I don’t know if there is a better one. It worked great, and I’ll need it only once every five years or so, which means my search for a cherry pitter is over.
May 15, 2016 | How to
Edit May 15, 2016: This was first published on April 28, 2008. It looks like parts 1 and 3 of this series were lost when this website was jacked and I had to recreate it. If I had the posts, they’d be on hard drives long since smashed to bits. In the original incarnation of this how-to, there are more steps between the re-numbered step 8 here and step 9 in part 2. The finished product is a little less shiny, but it looks and works the same. We’ve had to replace the ball valve at least three times because we often don’t shut the water off soon enough for our first freeze of the winter and they obviously don’t make brass valves like they used to. Or, it takes us more than three times to learn a lesson.
If you’re concerned that a fire hydrant in your yard will confuse firefighters in the event of a house fire, read this and know that you are insulting their intelligence. This no-longer-functioning hydrant is about 100 feet up our driveway. If a fire truck pulls up that driveway to our house and thinks the hydrant with a garden hose coming out of the front of it is where he or she needs to attach his or her giant fire hose, we’ve got bigger problems to worry about. After the small fire linked-to above, the firefighters noticed the hydrant next to the steps leading to our front door (it was dark): “Oh, cool. Hey, come and look at this.” I asked if there were any way this sort of garden decoration would be confusing to a real firefighter. Oh, how they laughed.
I don’t know where one would get an old fire hydrant. If only there were a way to search for such information. Captain OCD got this off of an old commercial job site where they tore out almost all of the existing infrastructure to make way for a new shopping complex. He wouldn’t tell me what other sorts of heavy duty commercial parts were in the scrap heap because he didn’t want to haul home even more crap that I might someday use for something.
1. Gut the hydrant. I don’t know what the guts looked like because someone decided that he could disembowel it without any helpful hints from me, but I hear they were extremely heavy.

2. Assemble your tools and strip the big chunks of loose paint. We were going to have the whole thing bead blasted. Like that was ever going to happen, so I used an assortment of wire brushes and wheels so it wouldn’t be yet one more unfinished project taking up space. I decided that I wanted to honor the noble heritage of the old hydrant by proudly displaying its many layers of experience instead of stripping them away, like something to be ashamed of. And I was too lazy to strip the whole thing down to bare cast iron. We don’t have a shop, so I cleared away most of the hay in the carport because it’s open and covered.
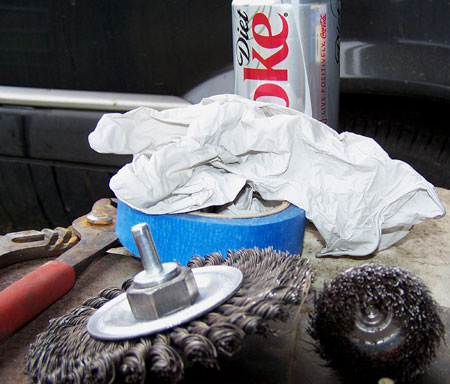
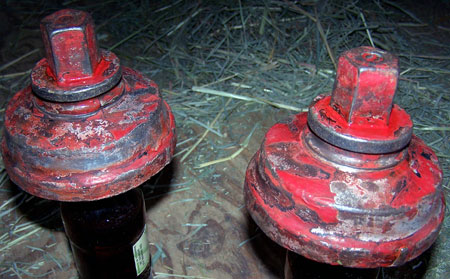
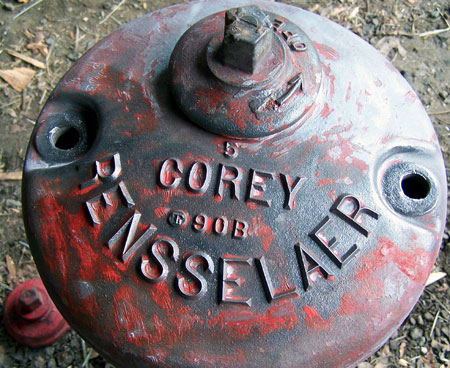
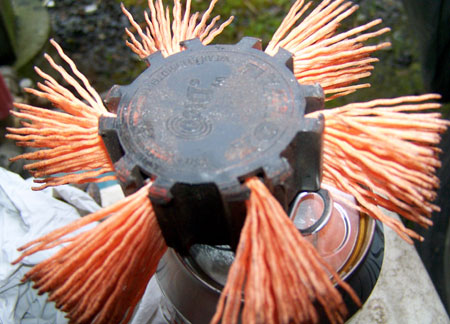
3. The top was so encrusted with a sandy cement-like covering that there was no hint that any of these letters were underneath it all. It came off pretty easily with this, on the end of a drill (that’s an arbor in the middle so it would fit in the drill). Be careful if you’re fond of your skin because this will mess you up.
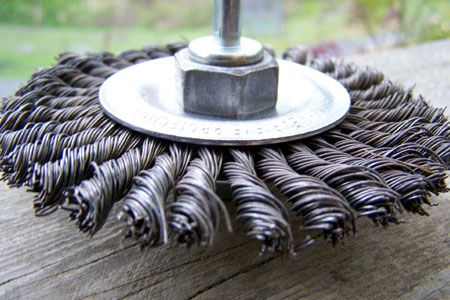
4. When you go to the hardware store to buy a wire wheel sturdy enough to get all those layers of life off, don’t be fooled by the seductive promise of up to ten times more use out of this piece of crap with the orange bits. It costs twice what a wire wheel costs, so it must be better, right? It will last 100 times as long because it does nothing more than caress the old paint.
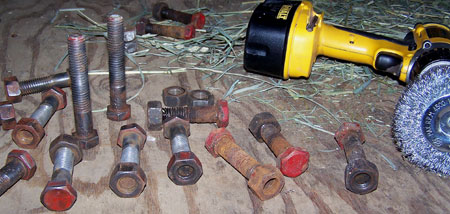
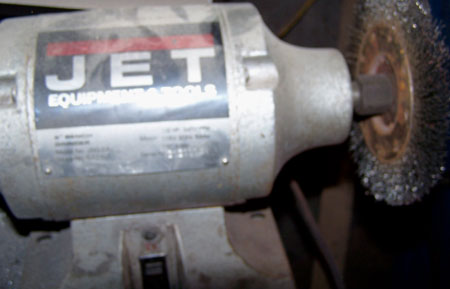
5. For the bolts (and the caps, above), I used a wire wheel on a bench grinder. We’ll need only ten of the bolts, so no need for superfluous rust-stripping on the rest of them. The rest of the hydrant was too heavy to muscle around the bench grinder, hence the drill with wire wheels.
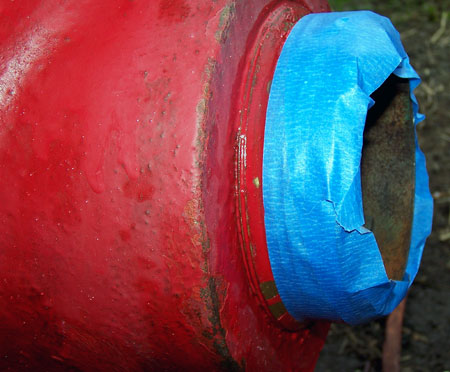
6. Tape off everything you don’t want paint on, like threads.This whole thread assembly, including the base where it meets the body that I didn’t tape off, is brass. It would look great with the new paint job if it were polished and clear-coated. Yeah, too lazy to bother stripping and polishing that up, too.

7. Wash off all the grinding dust and any oil or grease, then prime all the parts. Even if the paint says no primer needed, do it.

8. Paint all the parts. I used Hammerite on the red parts. I don’t know if this kind of Hammerite paint still exists.

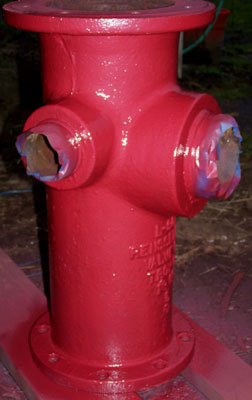
And antique brass Rust-Oleum Metallic indoor-outdoor paint on the top and the caps that will cover the holes on the body. The big hole (above photo) is where the spigot will be.
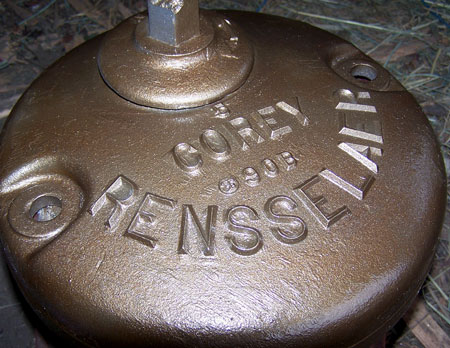
Now we’ll find valves and such to make the whole thing work in part 2.
May 15, 2016 | How to
Part 1 here.
Edit: This is where some steps are missing between parts 1 and 2 (see explanation in part 1), but there’s enough here and in the diagram above for you to get the gist of the project.
A bit of a recap of the missing steps: The cap that comes on old fire hydrants (unscrew cap, screw on fire hose – it looks like the caps on the side of the last picture below, but bigger) is too thick to drill through, so Captain OCD bought a new storz (cap) at a wholesale plumping supplier. Not cheap: about $125 at the time. He drilled a hole in the middle of the very expensive cap, rendering it useless if it didn’t work out. The hole is for the pipe to come out of the hydrant to attach the fittings for the valve. That leaves you with a blank, unthreaded hole, so he used big brass washers (in diagram above) on either side of the front half of the storz (the back half is screwed into the hole where the original cap was), in combination with the brass coupler between the outside of the storz and the valve, to hold the whole valve assembly tight to the storz.
9. Connect the pipe assembly inside the hydrant to the valve assembly on the back of the storz. In tight quarters you’ll be cutting the PVC pipe to the proper length, gluing, and likely questioning the parenthood of the fire hydrant.
10. Turn the water on and check thoroughly for leaks. Fix ’em if you got ’em.
11. When you’ve eliminated any leaks where you’ve glued or screwed things together, fill the hydrant with foam packing peanuts or something similar to insulate against the cold. The hydrant is essentially a cast iron meat locker, where cold air can hang out long enough to crack the pipe and fittings inside of it. While we’ve cracked three valves that are exposed to the air, the pipe inside the hydrant has never cracked due to cold.
12. This is what it looks like all done, with the hose attached. The fittings are wet because the new hose I bought to go with the new fire hydrant was missing a rubber washer. It’s not now. In this picture, you can see how the front half of the storz has those big ears around the edge so you can hit them with something heavy to quickly get it off and attach a fire hose to the back half of the storz.
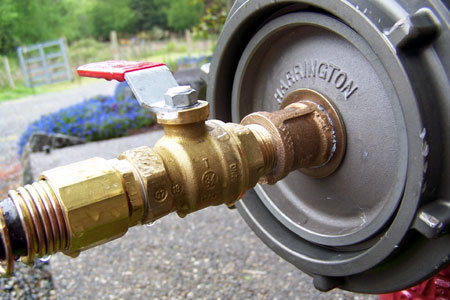
This is a ball valve, which means you turn it a quarter turn for full-on. I hate those twisty kind that take multiple twists to be fully opened – I have a car to wash; no time for excessive twisting of valve handles. I want the water either on or off, and if I want to control the flow, well, that’s what nozzles are for. Your entirely unnecessary project is turning a fire hydrant into a hose bib: you might as well make it work for you.
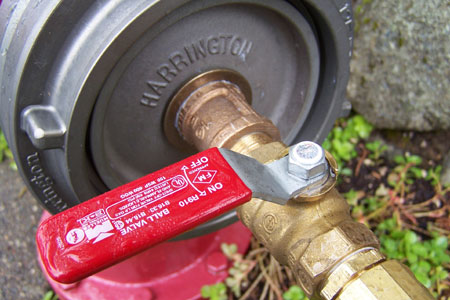
13. We’re done. That post with the copper cap on it is where we mounted the hose hanger (it’s waiting for the concrete to set here). It’s not ideal, but it’s the closest we could get it to the hydrant in this location Captain OCD has since repainted (again, near dawn) that top cap to match the body of the hydrant. If I had known what color the storz was going to be (it’s not painted, it came this way), I would have painted the bits I painted brass to more closely match. The top and the side caps come off with a quick twist so I’ll probably paint those to match some day. When there is pork in the treetops.
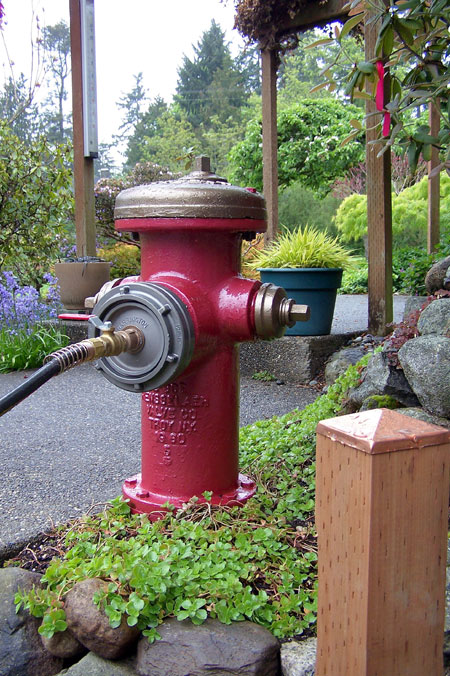
It looks like the hydrant has been here for years instead of hours because Captain OCD dug those plants (they’re kind of viney, so few roots), set them off to the side, and then replanted and spread them out when he was done. He also dug up enough of those 1-toddler rocks in the 4-foot ditch to the water source to build that little rock wall in front of the hydrant so no one would rip off their leg by walking too close to the valve if the hose weren’t attached.
__________________________________________________
Eight years later, this is what it looks like now:
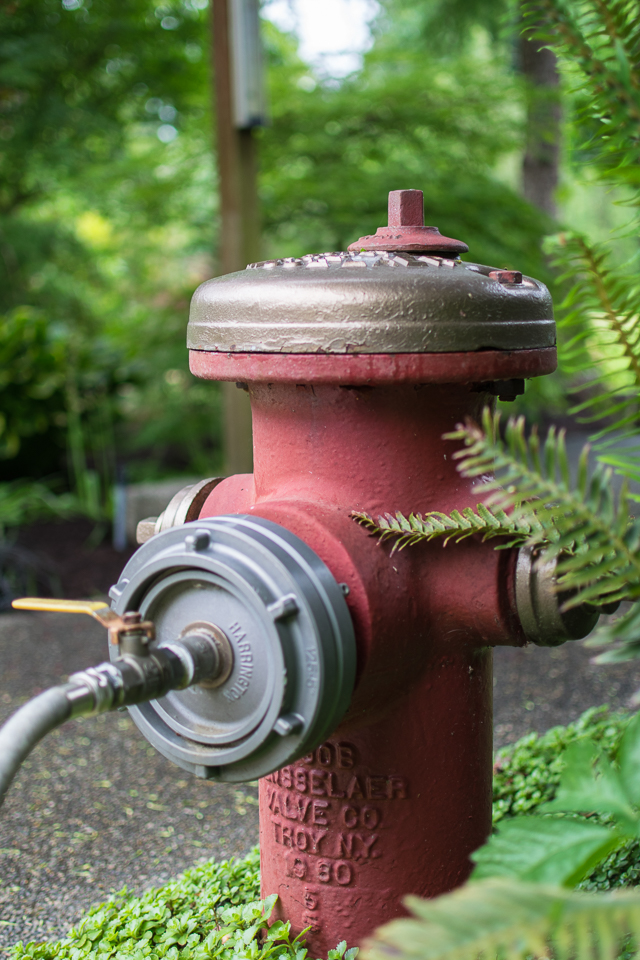
Not as shiny, but not bad. You can see the yellow handle of this valve: It’s yellow because it’s for natural gas. Every time we’ve replaced the valve it’s been difficult to find such a valve for water applications (red handle) in local stores.
Mar 23, 2014 | Daily, How to
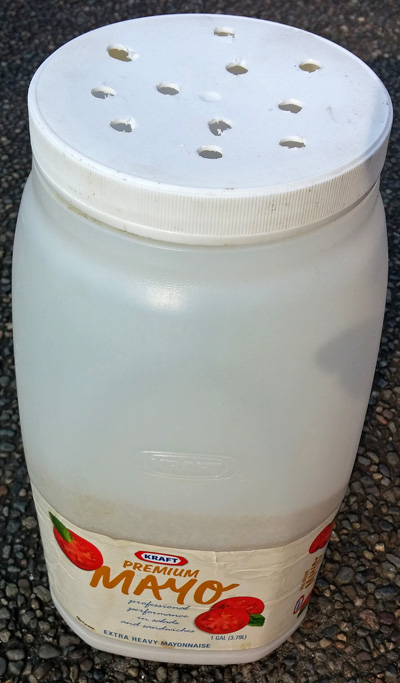
For non-selective applications.
- Buy a gallon of mayonnaise at Costco.
- Make a lot of macaroni salad or potato salad.
- Wash the jar.
- Drill holes in the lid.
- Make sure the jar is dry inside.
- Poor in the kill-everything-dead granules.
- Put the lid back on.
- Sprinkle on your long gravel driveway.
Sep 8, 2013 | How to
Last spring, Captain OCD and I took an infected cut on his finger to prompt care. While waiting, I ran out of waiting patients to play Guess the Ailment on, and turned my eye toward the wall with the TV.

I don’t know this woman and was trying to be sneaky with my phone. My guess is that people prefer to not have strangers taking photos of them while they wait in prompt care on a Saturday morning.
Hmm. We have a wall. In front of the wall had been a TV and a stack of components waiting for a home, but I couldn’t make up my mind exactly what do with them. Cabinet? Rack? Table? All too easy. Maybe I could build out the wall, sort of like this, and hide all the cords and wires.
Several months later, this is what we had:
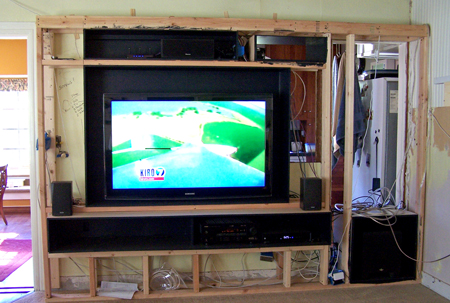
Don’t worry, those are not live wires in the zip-loc bags, just excess wire, waiting to be used. By the time I was done, there ended up being over 100 feet of wire in and to this thing.
On the right is the old doorway into the kitchen. We’ve never used it, but it’s the way the heat gets from the wood stove in the kitchen (opposite side of this wall) to the rest of the house. Should you ever wonder if it might be nice to see the back of your refrigerator from your living room, here’s your answer.
I built plywood boxes for the TV, the sub-woofer (bottom right), main components (under the TV, which sticks out about a foot from the wall, so it’s also a shelf), and other components, like the center speaker and router (above the TV), and then set them in the framework. I wanted the components to disappear, so I painted the inside of the boxes black. My power tools consist primarily of a mid-priced chop saw, a crappy portable table saw, a cordless drill and circular saw, and no workshop, so the black also served to hide the less-than-precise joinery (big fan of caulk here). I was worried about how the black would work, but I couldn’t be more happy with the way it turned out – it functioned exactly how I’d hoped.
There are outlets spaced evenly on the bottom of the component box, behind the TV, in the sub box, and in the upper component box. All of the outlets and switches are black (got them at Home Depot). To route cords and cables, I used wall plates like these, (but I got them at Lowes), at least two in each box, and spray-painted them black (I love that stuff).
I tried to future-proof this somewhat, which is why the TV box is bigger than the TV. And also why half of the bottom box is empty (ditched the DVD and CD players), so there are wires, TV cable, fiber optic cables, HDMI cables, ethernet cables, and speaker wire, with some extra of each, going from box to box. I also ran a dummy pull-cord through each route for future wire pulling. It took two of those wall plates to accommodate all the cable, cords, and speaker wire going to the back of the receiver. We have an older 5.1 receiver with only 1 HDMI outlet, so I ran extra HDMI cables and two extra speaker wires because I plan to go with a 7.1 receiver when I upgrade.
I also moved the router to this wall because it’s more centrally located. That involved running an Ethernet cable from the modem on the inside of an outside wall to this wall, then back to the room where the desktop computer and modem are. Amazon, again, for cheap good quality cables, cheaper than Monoprice in this case. I was going to go with black Ethernet cables, but got purple because they were lots cheaper. Turns out the color didn’t matter because they are hidden so well.
Then I realized that my white router simply wouldn’t do amid all the black. So, what the hell, I didn’t have anything to lose, and got out a Sharpie. Do you see a white plastic box in the upper left box above the TV? The Sharpied router disappeared. Up close, it looks like a black box and not a marker-covered white box, and the blue lights show through the Sharpie.
This is what we ended up with:
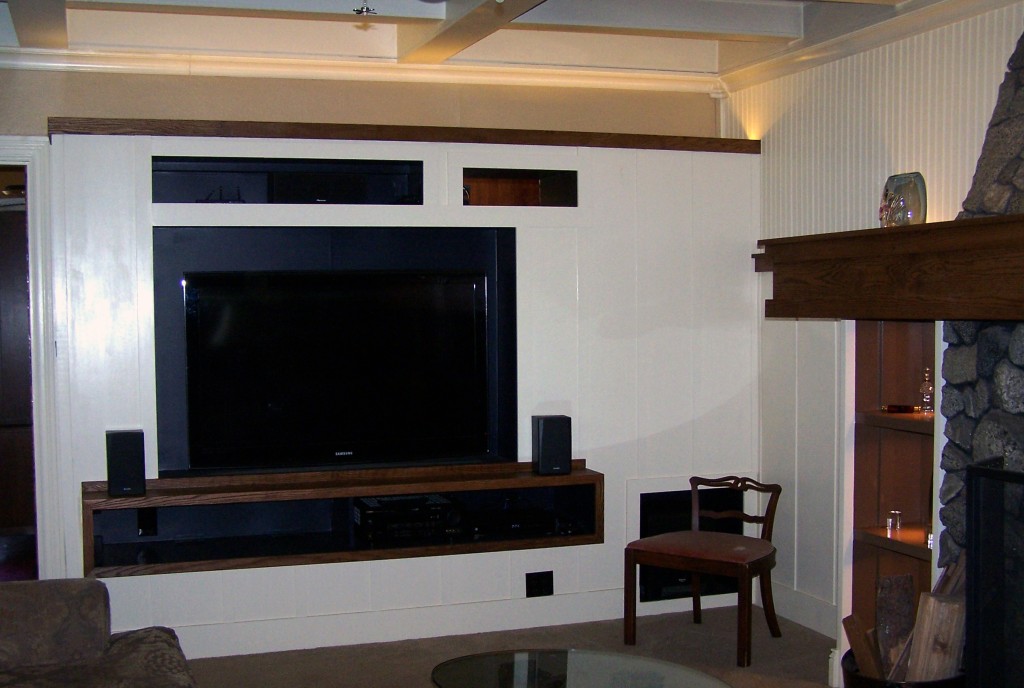
I’ve tweaked the exposure beyond optimal to see inside the boxes a bit. That’s not a sprinkler head. It’s a fan-shaped thing on the end of the fan pull cord. The plan was to have it wired directly to the wall switch, but that would have involved tearing the ceiling out to get to the old wires and I’d had enough. So, the wall switch turns on the power to the fan and light, but the speed controls are on the pull chain. Just that was a two-week project because there is some weird legacy wiring going on here.
This project included painting the whole room, re-doing the mantel (right), and re-doing lighting. Inside the mantel and above the TV wall I used these, and am quite pleased. So pleased that I’m going to buy more, because there will be more light projects.
The Christmas tree will go in the corner where the chair is (no more moving furniture to make room for the Christmas tree), and that double-duplex outlet is wired to two switches for tree lights. That, the mantel and bookshelf lights, switched outlets in the mantel, the upper TV wall lights, and an overhead light/fan are all wired to switches on the outside end of the TV wall. Six switches in all, on three dual switches (like this, but black) so it doesn’t look like a cockpit.
I spent many hours trolling for ideas and help with this project, which is why I post this sort of thing. If you have other things to do, stay away from Houzz.
Apr 22, 2009 | How to
Ventilation tubes for an underground bunker awaiting habitation in the event of Armageddon?Or potato planters? Either way, they’re a lovely addition to the landscape.
Because I’m not much of a gardener and I’m lazy, I assume that if I know a gardening trick, it must be old news. But Captain OCD didn’t know about this trick until I told him a few years ago, and most of his life has been spent with plants. I thought everyone knew the trick about planting potatoes in old tires or garbage cans (these are drainage pipes), but I’ve recently been told otherwise.
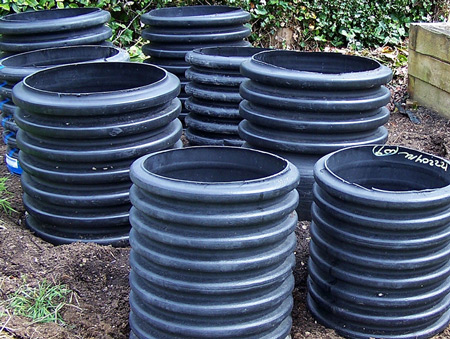
Plant the potatoes in the ground and put the tires or whatever you use over them. Or, you can put a little dirt (I think that’s generally known as soil in gardening parlance) in the tubes and plant the potatoes in that. As they grow, cover them with dirt (leaving the top of the plants free), a little at a time, throughout the season. You can periodically dig new potatoes throughout the growing season. By the end of the season you’ll have potatoes both in the ground and in the dirt in the container. At the end of the season when the plants die back (after they flower), leave the potatoes in the dirt for a week and then dig them: They’ll keep a lot longer that way. Two years ago we had potatoes for months after the end of the growing season (kept in a cool, dark place). This is an efficient way to get a lot of potatoes in a smaller area, and the dirt stays warmer, so they grow well.
These big black things seem to spontaneously generate each year, so that there are about twice as many as last year. Captain OCD is terribly excited to get his garden going this year (and I haven’t had to remind him that the only thing I’m doing with the garden is eating out of it), and has added purple potatoes to the inventory to go along with white, red, and yellow potatoes.


